Lighting designed & manufactured in Valencia, Spain
0%

Choosing Architectural downlights is not simply a matter of selecting attractive fixtures. The right choice must support the building’s purpose, atmosphere, comfort, and long-term performance. A narrow beam can sharpen artwork, while a wider beam can soften a corridor. Small changes matter.

Richard Kelly, a pioneering American lighting designer, said, “The art of lighting is to create the illusion of natural light.” His idea remains valuable today. Good downlights should reveal textures without producing harsh glare. They should guide movement without making the ceiling look crowded. They should also work quietly with daylight, controls, and changing room functions.

This guide examines the practical decisions behind a successful downlight scheme. It considers beam angle, lumen output, colour temperature, colour rendering, UGR, trim style, dimming compatibility, and IP protection. A warm 2700K fitting may suit a hotel lounge. A neutral 3500K option may support retail displays more effectively. The answer depends on surfaces, ceiling height, viewing distances, and user expectations.

Real projects rarely behave exactly like drawings. A polished sample can still create glare after installation. A high-output fitting can expose uneven plaster. Even experienced designers make assumptions that deserve testing. Mock-ups are useful, especially beside reflective stone, dark timber, or glossy artwork. Product data helps, but site experience matters more than impressive numbers alone.

The sections ahead will help you compare Architectural downlights with greater confidence. They focus on visual comfort, installation realities, energy use, maintenance access, and reliable supplier information. The goal is not to find one perfect product. It is to create light that feels intentional, comfortable, and appropriate for the people using the space.
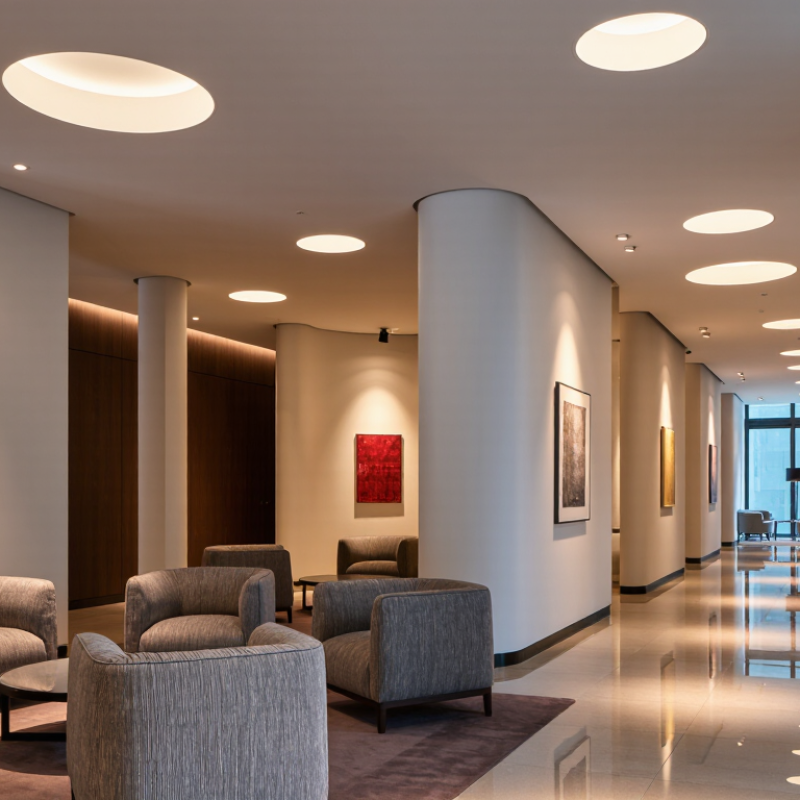
How to Choose Architectural Downlights for Your Project?

Define Project Requirements and Lighting Objectives

Start with the room, not the fitting. Record its dimensions, ceiling height, surface finishes, daylight levels, and user activities. A gallery needs controlled vertical illumination, while a kitchen needs useful task light with minimal glare. Many office projects target 300–500 lux, according to EN 12464-1 guidance, but local standards should always be checked.

Define measurable lighting objectives before comparing architectural downlights. Set target illuminance, beam angle, uniformity, glare control, colour temperature, and colour rendering. The IEA reports that buildings consume about 30% of global final energy, making efficient operation a practical design responsibility. The U.S. Department of Energy also reports that LED products use at least 75% less energy and last up to 25 times longer than incandescent lighting. Those figures are helpful, but they do not replace a proper lighting calculation.

I learned this through an avoidable mistake. A narrow beam made a textured wall look dramatic, yet created dark patches across the floor. Review reflectance values, spacing, mounting depth, and dimming behaviour together. For artwork or retail displays, evaluate colour fidelity with IES TM-30 metrics, not CRI alone. A high CRI number can still hide weak red rendering. Specify glare limits early, especially in low-ceiling rooms. UGR calculations can expose discomfort before installation, although real finishes and viewing positions may change the result. Build a small mock-up when possible. It may feel excessive, but assumptions often fail under actual site conditions.

Define Project Requirements and Lighting Objectives

Representative maintained illuminance targets help establish the required output and beam distribution of architectural downlights. Actual values should be confirmed against the project brief and applicable local lighting standards.

Compare Downlight Types, Beam Angles, and Light Distribution

Choosing architectural downlights starts with the room’s visual task, not the fitting’s appearance.

Fixed downlights create consistent pools of light for corridors and compact rooms. Adjustable gimbal downlights can highlight artwork, shelving, or textured walls. Recessed fixtures usually look clean, but they need accurate ceiling coordination. Surface-mounted options suit shallow ceilings, although their bodies remain more visible. I have seen attractive layouts fail because maintenance access was ignored.

Beam angle controls how light spreads across a surface. Narrow beams, often below 24 degrees, create focused accents and stronger shadows. Medium beams, around 25 to 40 degrees, suit general lighting over desks, kitchen counters, and circulation areas. Wide beams soften coverage in lounges and open-plan spaces. Avoid choosing angles by habit. Ceiling height, spacing, and wall reflectance change the result. A narrow beam can leave dark gaps when fittings are placed too far apart.

Tips: Mock up one section before ordering the full quantity. Check the beam edge on the floor and nearby walls. Compare 3000K and 4000K samples beside the actual finishes. Use overlapping beams for smoother distribution, but watch for excessive brightness near eye level. Review glare from standing and seated positions. A tidy ceiling grid is useful, yet perfect symmetry may not serve the furniture plan. Recheck the layout after furniture, artwork, and ventilation locations are confirmed.

Evaluate Size, Trim Style, Materials, and Installation Method

Choosing architectural downlights starts with the ceiling, not the catalogue. Measure room height, joist spacing, and visible beam lines before selecting a size. A 75 mm aperture can look precise in a narrow corridor, while a larger opening may suit a high lounge ceiling. Do not chase the smallest fitting automatically. Tiny optics can create harsh pools and difficult maintenance. In my site experience, mock-ups reveal problems that drawings often hide. Leave room for a sample.

Trim style should support the architecture. Recessed trim gives a quiet edge, while trimless fittings create a sharper, plastered appearance. Adjustable versions help aim light toward artwork or shelving, but they need clearance above the ceiling. Choose finishes that relate to nearby metalwork, then check samples under the actual lamp color. Painted white can appear warm beside cool light. It sounds minor. It changes the ceiling.

Material selection affects heat control, durability, and cleaning. Aluminum bodies usually dissipate heat well, while robust polymers can reduce weight and resist some moisture. Confirm the fitting’s rated location instead of guessing from appearance. Installation method must match the structure. New ceilings may accept recessed housings, but renovation projects often need shallow or surface-mounted options. Check insulation contact, driver access, fire requirements, and cutout tolerance with the installer. I have seen an elegant fitting fail because its driver was buried. Plan access before closing the ceiling. Even careful specifications can miss one awkward joist.

How to Choose Architectural Downlights for Your Project?

Evaluation Dimension Typical Options or Range Recommended Selection by Application Key Technical Considerations Project Checkpoint
Downlight Size Compact: 50–75 mm aperture
Standard: 75–100 mm aperture
Large: 125–200 mm aperture
Larger apertures can provide higher light output and lower glare when properly designed. The visible aperture should complement the ceiling scale and architectural layout. Confirm the ceiling cut-out, fixture diameter, depth, and available void space before ordering.
Ceiling Cut-Out Common cut-outs include approximately 68 mm, 75 mm, 83 mm, 95 mm, 125 mm, and 150 mm. The trim flange must fully cover the cut-out. Oversized openings may require a conversion plate or a revised ceiling detail. Measure the actual opening rather than relying only on the nominal fixture size.
Trim Style Trimless, flanged, adjustable, fixed, square, round, recessed, or surface-mounted. Trimless products require accurate plastering or finishing. Adjustable models need sufficient aiming clearance and may show more visible glare if poorly positioned. Coordinate the trim profile with the ceiling material, finish, and interior design language.
Trim Finish White, black, silver, matte metallic, or custom architectural finish. Matte surfaces generally reduce distracting reflections. The finish should remain consistent across all visible luminaires in the space. Approve a physical sample under the project’s actual lighting conditions.
Housing Material Die-cast aluminum, extruded aluminum, stamped steel, or high-temperature polymer components. Thermal performance affects LED lifetime and light output. The housing should be compatible with the ceiling assembly and local fire-safety requirements. Review heat-management data, operating temperature, and installation clearances.
Reflector or Optic High-reflectance reflector, lens optic, or mixed optical system. Optical efficiency, beam control, cutoff angle, and luminance influence both appearance and occupant comfort. Request photometric files and verify the layout with lighting calculations.
Beam Angle Narrow: 10°–20°
Medium: 24°–40°
Wide: 50°–80°
Beam selection depends on ceiling height, spacing, target surface, and desired uniformity. Narrow beams require more accurate aiming. Check beam overlap and illuminance uniformity at the working plane or display surface.
Installation Method Recessed, trimless recessed, surface-mounted, or suspended installation. Recessed installation requires a suitable ceiling cavity, mounting clips, and driver access. Surface-mounted units must be fixed to a structurally sound surface. Coordinate mounting details with ceiling trades, electrical services, and access-panel locations.
Ceiling Compatibility Plasterboard, mineral fiber tile, metal ceiling, concrete, timber, or exposed structure. Tile ceilings may require a support bracket or independent safety wire. Concrete ceilings commonly require surface-mounted or specially anchored solutions. Verify thickness limits, structural support, fire barriers, and vibration conditions.
Light Output Approximately 500–1,500 delivered lumens for many architectural downlight applications. Compare delivered lumens rather than LED chip lumens. Required output depends on room reflectance, spacing, task illuminance, and maintenance factors. Base the final selection on a lighting calculation, not wattage alone.
Color Temperature 2700 K, 3000 K, 3500 K, 4000 K, and 5000 K. Color temperature affects perceived warmth, material appearance, and visual atmosphere. Avoid mixing noticeably different color temperatures in one visual field. Confirm the selected color temperature with the interior and finishes schedule.
Color Rendering CRI 80+ for general applications; CRI 90+ for retail, hospitality, galleries, and high-quality residential interiors. For demanding applications, also review R9 performance and consistency across the project. Request the complete color-rendering specification and test samples where color accuracy is critical.
Glare Control Open reflector, baffle, deep reflector, shielding cone, or lens-based glare control. Glare depends on luminance, viewing angle, ceiling height, room geometry, and fixture position. A higher cutoff angle can improve visual comfort. Review unified glare calculations where required and assess the luminaire from normal occupant viewpoints.
Ingress Protection IP20 for dry indoor spaces; IP44 or higher for areas exposed to limited splashing; higher ratings for wet zones as required by regulations. IP ratings describe protection against solid objects and water ingress. They do not replace local electrical or wet-location requirements. Confirm the environmental rating for bathrooms, kitchens, exterior soffits, and semi-outdoor areas.
Fire and Insulation Rating Standard, fire-rated, IC-rated, or insulation-contact compatible designs, depending on local code. Clearance requirements vary by product and jurisdiction. Do not cover a fixture or driver unless the installation instructions permit it. Check local code, ceiling construction, insulation conditions, and the complete installation instruction.
Driver and Dimming Non-dimming, phase-cut, 0–10 V, DALI, or other project-specified control systems. Driver dimensions, remote or integral mounting, minimum dimming level, flicker performance, and emergency-lighting interfaces must be coordinated. Test the complete luminaire-control combination before bulk installation.
Maintenance and Replacement Replaceable lamp, replaceable LED module, or integrated LED luminaire. Consider driver replacement, spare-part availability, cleaning access, and the ability to maintain a consistent appearance over time. Include maintenance access and replacement procedures in the project handover documents.
Final Project Fit Architectural appearance, lighting performance, compliance, installation practicality, and lifecycle cost. The best downlight is not necessarily the smallest or highest-output product; it should support the project’s intended atmosphere and measurable lighting requirements. Approve the fixture through drawings, samples, photometric data, installation details, and an on-site mock-up when appropriate.
Typical ranges are provided for early design comparison. Final selections should be verified against local regulations, project specifications, photometric calculations, and the manufacturer’s installation instructions.

Check Performance Ratings, Energy Use, and Control Compatibility

How to Choose Architectural Downlights for Your Project?

Check Performance Ratings, Energy Use, and Control Compatibility

When selecting architectural downlights, start with the room’s actual lighting needs. In site audits, I compare ceiling height, surface colour, beam angle, and target illuminance. A narrow beam can highlight artwork, while a wider beam reduces harsh patches on office floors. Check lumen output, colour rendering, glare rating, and colour consistency. Do not trust wattage alone. Request independent photometric files and safety documentation before approving samples.

Energy performance matters during installation and daily operation. A 10-watt fitting may replace an older 20-watt fitting, but only if its useful light output is sufficient. Review lumens per watt, standby consumption, rated life, and thermal performance. Poor heat management can reduce output over time. Look for clear test conditions. Marketing figures can be incomplete. That detail deserves scrutiny.

Control compatibility can prevent expensive rework. Confirm whether the fitting supports phase dimming, 0–10V, DALI, or another required system. Check minimum and maximum dimming levels, driver type, flicker behaviour, and emergency-control requirements. I once specified fittings that dimmed correctly in the showroom but flickered after installation. The control system was unsuitable. Test the complete circuit with the intended switches, sensors, and cables. Also inspect access above the ceiling, because a perfect specification becomes inconvenient when drivers cannot be replaced.

Plan Layout, Calculate Quantity, and Verify Building Code Compliance

How to Choose Architectural Downlights for Your Project?

Plan the layout from the room’s use, not from a perfectly spaced ceiling grid. Mark desks, counters, artwork, circulation paths, and areas needing visual focus. For general lighting, estimate lumens with this formula: area × target illuminance ÷ utilization factor ÷ maintenance factor. A 40-square-metre office targeting 500 lux needs more than 20,000 delivered lumens before losses. The U.S. Department of Energy reports that commercial LED luminaires can exceed 150 lumens per watt, but real performance depends on optics, temperature, and installation conditions. Do not design from catalogue efficacy alone.

Spacing should reflect mounting height and beam angle. A narrow beam may create bright pools and dark gaps. A wider optic can improve uniformity, though it may reduce visual emphasis. Mock up one ceiling bay when possible. It is a small test, but it exposes uncomfortable shadows early. I have seen clean drawings fail on site because beams missed work surfaces.

Quantity is only half the decision. Check the locally adopted energy code, including lighting power density, automatic shutoff, daylight response, and occupancy controls. ASHRAE Standard 90.1 provides widely used commercial efficiency requirements, but jurisdictions may adopt different editions. Confirm emergency-lighting rules and required illuminance with the authority having jurisdiction. The International Energy Agency estimates lighting represents about 15% of global electricity use, making compliance and control design operational priorities, not paperwork. Recheck calculations after selecting trim, driver, dimming protocol, and ceiling finish. Small changes matter.

FAQS

How should I choose between fixed, adjustable, recessed, and surface-mounted downlights?

Choose according to the room’s visual task. Fixed fittings suit corridors, while adjustable versions highlight artwork or shelving. Recessed fittings look clean but require accurate ceiling coordination. Surface-mounted fittings work well where ceiling depth is limited.

What beam angle is suitable for general room lighting?

Narrow beams below 24 degrees create focused accents and stronger shadows. Medium beams around 25 to 40 degrees suit desks, counters, and circulation areas. Wide beams provide softer coverage in lounges and open-plan spaces.

Why can narrow beams create dark gaps?

Narrow light spreads over a smaller area. Excessive spacing can leave dark patches between bright pools. Check the beam edge on the floor and nearby walls before final installation.

How can I test the lighting layout before ordering everything?

Mock up one ceiling section first. Compare the light on floors, walls, work surfaces, and furniture. Review glare from seated and standing positions. Small tests reveal problems drawings often miss.

How do ceiling height and furniture affect downlight placement?

Mark desks, counters, artwork, circulation paths, and ventilation locations. Then adjust the layout around real furniture. Perfect symmetry may look tidy but still miss important work surfaces.

How do I select the fitting size and trim style?

Measure ceiling height, joist spacing, and visible beam lines. A 75-millimetre aperture may suit a narrow corridor. Larger openings can fit high ceilings better. Recessed trims appear quiet, while trimless styles create a sharper plastered edge.

What materials and installation details should I check?

Aluminum bodies usually release heat effectively. Durable polymers can reduce weight and tolerate some moisture. Confirm the rated location, insulation contact, fire requirements, cutout tolerance, and driver access. Never bury the driver.

How can I estimate the required number of downlights?

Use this estimate: area × target illuminance ÷ utilization factor ÷ maintenance factor. A 40-square-metre office at 500 lux needs more than 20,000 delivered lumens before losses. Actual results depend on optics, temperature, finishes, and installation.

What should I verify for energy and building requirements?

Check local rules for lighting power, automatic shutoff, daylight response, occupancy controls, and emergency lighting. Confirm required illuminance with the local authority. Recheck calculations after selecting the trim, driver, dimming method, and ceiling finish. Small changes matter.

Conclusion

Choosing the right Architectural downlights begins with clearly defining your project’s purpose, room functions, desired atmosphere, and lighting objectives. Consider whether the space needs focused task lighting, broad ambient illumination, accent lighting, or a balanced combination. Compare different downlight types, beam angles, and light distribution patterns to achieve suitable coverage and visual comfort. You should also evaluate fixture size, trim style, materials, color appearance, and installation method so the fittings complement the architectural design and work with the ceiling structure.

Performance is equally important. Review brightness, color consistency, glare control, energy efficiency, heat management, and compatibility with dimming or other lighting controls. Before installation, create a layout that considers ceiling height, spacing, furniture placement, and areas requiring additional emphasis. Calculate the required quantity and confirm that the selected products meet relevant building, electrical, fire-safety, and environmental requirements. A thorough planning process will help deliver reliable illumination, efficient operation, easy maintenance, and a cohesive result that supports both the practical and aesthetic goals of the project.


Seraphina

Seraphina

Seraphina is a dedicated marketing professional with a deep understanding of the company’s products, customers, and evolving market needs. Through her thoughtful strategies and clear communication, she helps translate complex product features into practical value for businesses and everyday users.......